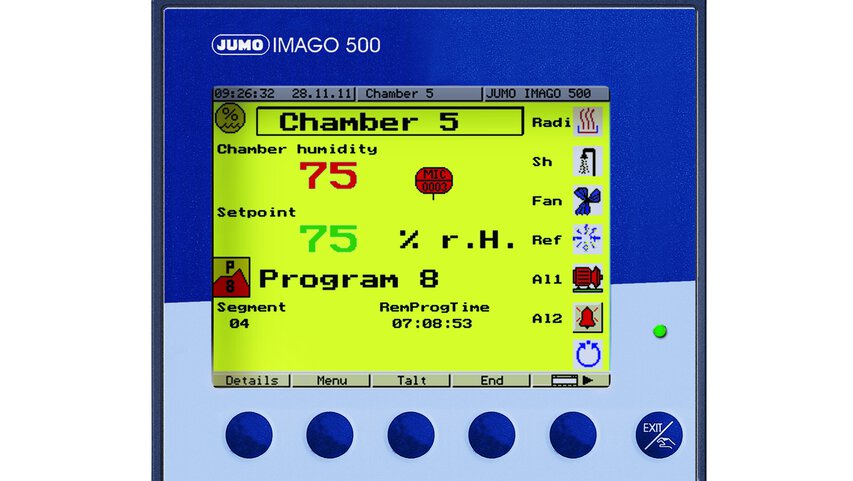

JUMO IMAGO 500
Table of content
What does '*****' mean in the display?
If this error message appears, there are several possible causes.
The following points should be checked:
- Is the sensor (or the input signal) properly connected?
- Is the sensor faulty, or is the input signal outside the limits of the measurement range?
- Has the analog input been configured correctly?
How can I start the autotuning function of the program controller?
The preconditions for starting the autotuning function of the JUMO IMAGO 500 are that the device is in the basic status and autotuning has been enabled in the configuration level.
The output that is to be optimized must be set correctly (e.g. relay / analog output / solid-state). See Operating Instructions B 703590 ”Controller 1 (2...4) > Autotuning”.
Activating the Exit/Hand button for > 2seconds switches the program controller over to ”Manual mode”. Use the UP/DOWN button to enter the required value for the setpoint, and confirm with ENTER.
Activating the buttons


produces the

button, which can be used to start the autotuning and stop it again. The use of this softkey/button combination only optimizes the channel that has been selected for display.
How can I alter the setpoint value for the program controller in the basic status?
To alter the setpoint value for the program controller, in the basic status, proceed as follows:
First press the softkey

and then the softkey

. The

button will then appear, which you can use to alter the setpoint in the basic status.
How can I set the date and time?
If the date and time need to be set, this can be done either directly on the Imago 500, in the menu item ”Configuration > Device data > Date and time”, or in Setup, under the menu item ”Extras > Date and time”.
The transfer of the date and time is made regardless of any Setup data transmission.
How can I set the sampling time?
The sampling time can be set in the Setup program, in the menu item ”Device data”.
A time of 50, 150 or 250 milliseconds can be selected, according to the application.
The actual sampling time that will result can differ from the preset sampling time.
On the Imago 500, you can see the true sampling time in the menu item ”Menu > Configuration level > Device data > System sampling time”.
This system sampling time cannot be programmed directly, but can only be influenced by the number of functions that must be performed and the number of controllers.
How can I configure the user level?
The user level is an additional level that will only be visible when it has been configured. Up to 8 application-specific parameters can be shown here, and edited within this level.
In the Setup program, under the menu item ”Display” - ”User level”, you can select the parameters for the user level by entering the addresses and defining customer-specific names for them.
Caution! For Float parameters you must take the corresponding address +1
(e.g. Limit comparator for threshold Al 1, address 0x026F +1 = 0x0270)
Note: This only applies up to and including device version 162.02.05
How can I change the device language?
Changing the device language must be carried out in two steps.
In the first step, the required language is selected and transmitted to the device, using Setup and the Device Assistant ”Edit > Hardware”.
In the second step, the required language is selected for the item "Extras > Device texts library" and transmitted to the device, using the ”Transmit” button.
This change will only take effect after the device has been switched off and then switched on again.
How can I change the unit of measurement?
In the standard version, the unit of measurement is set to °C. If a different unit of measurement is required, it can be set through the Setup program, for the appropriate ”Analog value”, in the menu item ”Controller pics”.
In the section ”Unit”, the required measurement unit can be entered in the item ”Text”.

How can I enable device options?
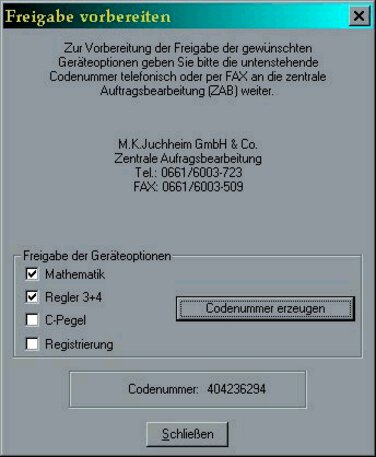
There are several device options (math, controller 3+4, C-level, recording) that can be enabled through the Setup program, using a release code.
In order to be able to access these options, the device must be online. In the Setup program, go to the ”Extras” menu in the task bar, and then to the item ”Enable device options”.
Activating ”Read code” opens a further window, in which the required options are marked:

Pressing the ”Generate code number” button will produce the required code numbers that you will need when you call the correct phone or fax number.
You will be given a release code that you can enter in the appropriate field, using the ”Enable” button.
Caution! The code number may be given with a mathematical sign.
How can I program a gradient within the program?
A time-dependent programming can be implemented with the Imago 500. If a gradient is needed, then the rate of change must be converted to give a value for the time period.
If, for instance, the setpoint is supposed to change from 10°C to 100°C at a rate of 5°C per minute, then the following conversion is required:
Setpoint change of 90 °C / 5 °C per minute = 18 minutes for the complete ramp.

How can I enable program options?
In a similar way to the device options, there are a number of program options (Startup, Teleservice, Program Editor) that can be enabled for the Setup program.
Under the menu item ”Extras” – ”Enable program options” you can enter your license number to enable the function you need.
You can obtain the license number from the central order processing department of JUMO in Fulda:
Phone: +49 661 6003 723
Fax: +49 661 6003 509
How long can I record measurement data, using Startup?
The maximum recording time is limited to 24 hours. The duration of the recording does not depend on the number of channels being used for recording. If the time limit for recording has been reached, a message will appear.

How can the error message 'PROFIBUS-DP ERROR' be suppressed if the PROFIBUS interface is not (yet) used?
If the IMAGO 500 is equipped with a PROFIBUS interface that is not yet used, then the error message "PROFIBUS-DP ERROR" will appear on the display.
This error message can be suppressed by entering the PROFIBUS device address "0" directly from the keys of the IMAGO 500.
From setup program version 162.03.xx 3.00(J) upwards, you can also use a PC to set the PROFIBUS device address to "0".
How can I make quick changes to the configuration with the Setup program?
Alterations to the settings in the Imago 500 can be made faster, using the Setup program, if you do not have to transmit all the data, but just the data for the section that has been changed.
To do this, the Imago 500 and the Setup program must be ”Online”.
In the dialog area, use the right mouse button to click on the field that has to be altered, and then select the menu item ”Edit display online”.

The currently valid settings will be read out and displayed. When you have finished editing and quit this menu item, the altered data for this section will automatically be transmitted to the Imago 500.
How can I start recording?
Recording is a device option that must be enabled in order to be used.
Recording will be started as soon as this function has been enabled and the device is connected.
You can select the required signals (e.g. process value, setpoint, control deviation etc.) either via the Setup program, or directly from the controller, in the menu item ”Recording”. These signals will then be subsequently recorded on the display, just like on a conventional recorder. The recorded time span depends on the sampling rate (which is adjustable) and can vary from about 12 hours to a maximum of 24 hours.
- ${title}${badge}

